Since moving to Mildura I have slowly been reassembling my “toys” that were packed away in boxes to move up here.
When I was in Horsham, I used to have an old MacBook running 10.6.8 OSX Server. I used it for storage, remote desktop and web hosting. Later versions of MacServer became less appealing when SQL server was dropped for PostgreSQL, so it just stayed that way.
I no-longer host my own websites or need to remote desktop home from work, so all i need was storage. A simple NAS would do this.
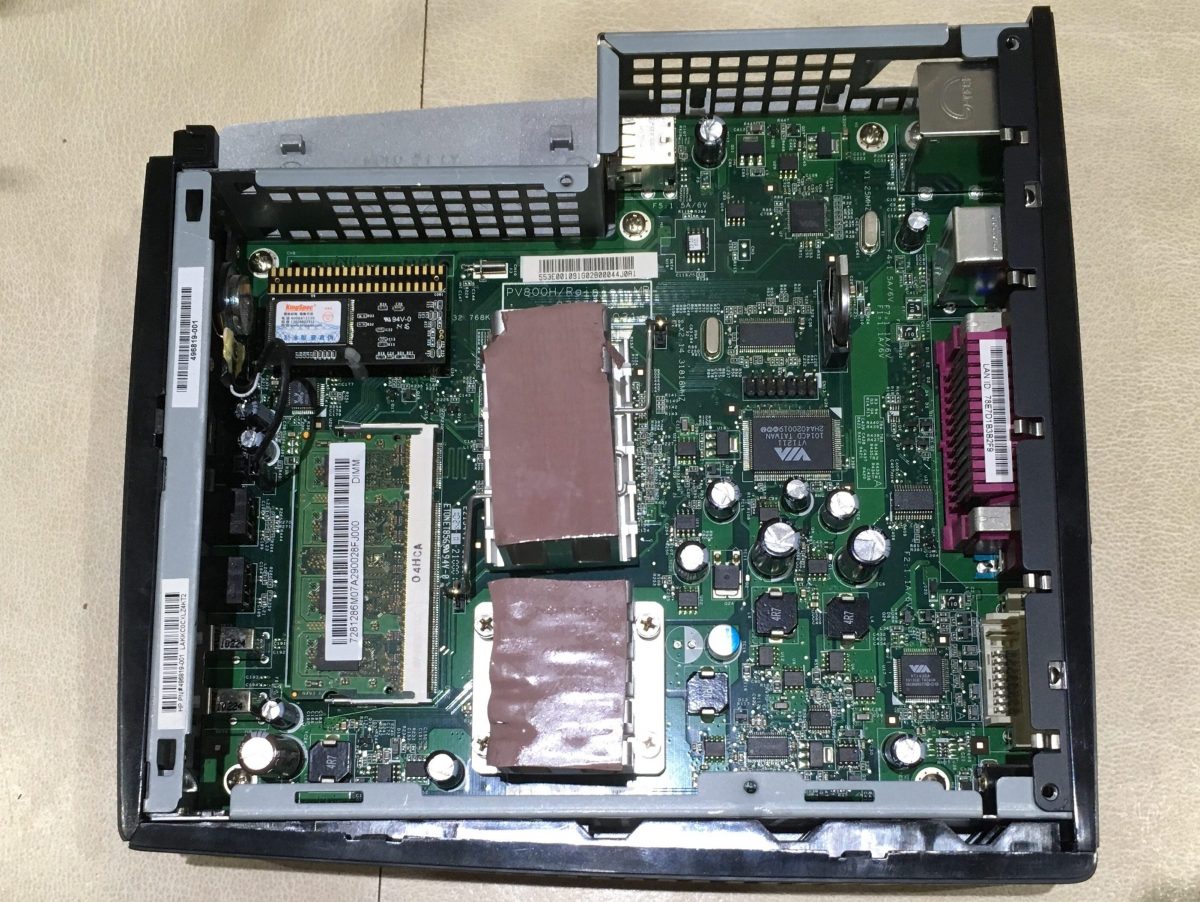
I recently purchased an armful of HP Thin Clients and I thought I might be able to make a home-brew NAS out of one of those. The HP T5540 feature a VIA Eden 1000Hz processor which would adequately run Linux. The RAM was upgraded from 512MB to 1GB, also the ATA flash card was also upgraded from 128MB to 8GB.
Initially I considered installing a USB hard drive for storage as the T5540 lacks a SATA socket. But after reading up on the thin-client at www.parkytowers.me.uk, I thought I might try to add a SATA port to the logic board as listed on the mods page.

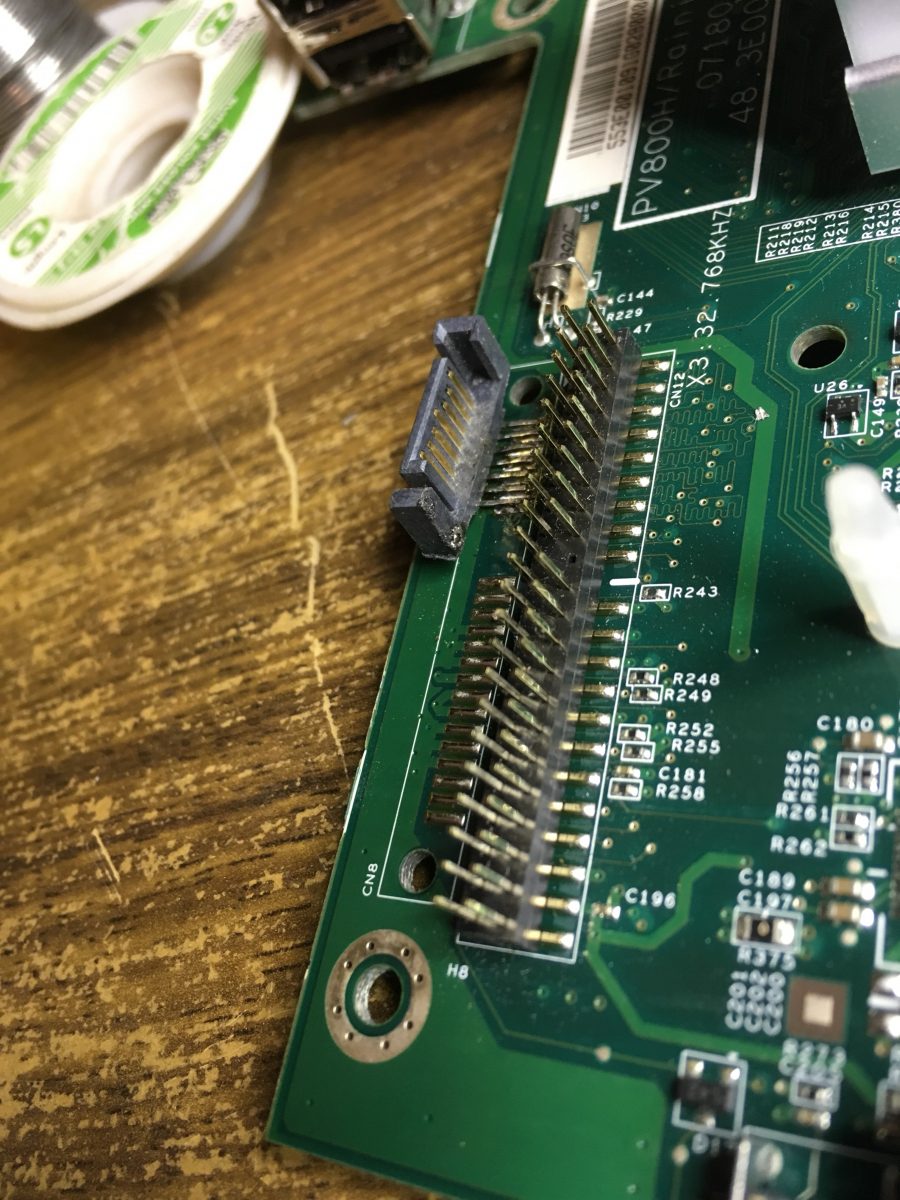
The SATA socket was scavenged my junk box and after a bit of cutting and filing and bending it fitted quite nicely on the board beside the ATA flash connector. While soldering the connector was a bit fiddly but relatively simple, I opted to use the SATA power connector of a SATA – Molex adaptor that I wired directly to the Logic Board.
CHOOSE YOUR SOFTWARE
There is quite a number of Linux NAS applications to choose from. After evaluating a number of options at www.how2shout.com, I was initially leaning towards FreeNAS. But it seemed a little over the top with features for what I needed for my single drive NAS.

I ended up choosing OpenMediaVault for several reasons, one being that was relatively simple to use, but mainly for the reason that it’s distro was Debian based. You can simply download an ISO and install it directly to the device, but given the low power processor and small amount of RAM in the T5540, I decided to stay away from the 64 bit version and roll my own 32 bit Debian build.
Debian 9 “Stretch” was chosen and a NetInstall iso was downloaded. Since OpenMediaVault is web-based, I chose to install without a desktop environment to reduce boot time and unnecessary load on the processor.
Once Debian was installed, i simply installed OMV with the following commands which was taken from Open Media Vault Forum.
cat <<EOF>> /etc/apt/sources.list.d/openmediavault.list

deb http://packages.openmediavault.org/public arrakis main

EOF
export LANG=C

export DEBIAN_FRONTEND=noninteractive

export APT_LISTCHANGES_FRONTEND=none

apt-get update

apt-get --allow-unauthenticated install openmediavault-keyring

apt-get update

apt-get --yes --auto-remove --show-upgraded \

--allow-downgrades --allow-change-held-packages \

--no-install-recommends \

--option Dpkg::Options::="--force-confdef" \

--option DPkg::Options::="--force-confold" \

install postfix openmediavault

omv-initsystem

OVM is pretty simple to configure and is well documented, but for a easy, quick and efficient overview of OpenMediaVault check out the following link. https://www.youtube.com/watch?v=j-CoUkT8WI4
To allow simple backups of my Apple Macs using Time Machine, The Netatalk Plug-in needs to be installed.
The NAS has been up and running for a few days now without an issue.
It reports a couple of minor errors during boot, but nothing that affects the operation of the NAS. Hopefully I see many years of operation out of it.