
I’ve been playing a bit with Home automation for the last year. It started when I bought a Sonoff to interface with the garage door. At the time I just wanted to be able to open and close the door from my phone and know if I had left it open while I was at work.
Well it snow balled from there.
I discovered that Homebridge was the answer to link my sonoff garage door opener to my iPhone. Soon after that I bought a Mirabella Smart Switch that I flashed with Tasmota. and a pile of other devices. But I tired quickly of Homebridge lacking a GUI, so I found HOOBS. I couldn’t justify buying a new AppleTV to allow automation, so to start with I just programmed my posse of Tasmotized Sonoffs and other smart devices to turn on and off using their own timers.
And then I bought a motion sensor which I of course tasmotized.
Enter Node-Red…
Node Red is an awesome piece of software that can easily be install beside Homebridge. With a web interface, flow charts can easily be made by any newbie to bring you house to life. With Node Red I managed to build my own weather station which Node Red could display the data on a webpage.
But I want more
Regularly I found myself visiting the forums of the Home Assistant Community, especially the Australian Certified thread which seems to be the best place to find out the latest Tasmotizable devices you can buy off the shelf locally from Bunnings or Kmart.
Maybe it’s time I have a look at Home Assistant.
I could have bought a new a new Raspberry Pi, but due to the amount of drive writes Home Assistant does, Raspberry Pi’s have a tendency of burning out the SD card that Home Assistant is loaded on. I like using thin clients as they are cheap and do pretty much anything you could do with the limited architecture of a Raspberry Pi.
I chose a HP T5550.
Natively it uses a Via Eden 1GHz processor and 2GB RAM.
It boots from a ATA “Disk on Module” but also has a SATA socket onboard.
So I souped it up and installed a Crucial 4GB DD3 module and a Western Digital 120GB SATA SSD. The Thin client has a Mini PCI bus for connecting a wireless adaptor but I bought a Wavlink Nano WIFI USB adaptor from the Techlab the local Jaycar dealer.
The display is a HP L2105tm 21″ touch LCD that I bought on eBay which connects quite nicely with a DVI-D cable.
Choose Your Flavour
Linux of course!
I like debian – anything that is on Ubuntu or Raspberry is easily installed on Debian.
The T5550 is modern enough to run a 64bit minimal XFCE desktop installation.
When installing, at the Software Selection menu – just choose XFCE, SSH server and standard system utilities.
Out of the box we need do do a little bit of house keeping before we install Home Assistant. To begin make sure you can ‘Sudo’.
Hint:
/usr/sbin/visudo
Update your /etc/apt/sources.list to include the following:
deb http://deb.debian.org/debian buster main contrib non-free
deb-src http://deb.debian.org/debian buster main contrib non-free

deb http://deb.debian.org/debian-security/ buster/updates main contrib non-free
deb-src http://deb.debian.org/debian-security/ buster/updates main contrib non-free

deb http://deb.debian.org/debian buster-updates main contrib non-free
deb-src http://deb.debian.org/debian buster-updates main contrib non-free
Perform to update APT and get your distro up to date.
sudo apt-get update -y && sudo apt-get upgrade -ya
To enable graphics acceleration and WIFI
sudo apt-get install xserver-xorg-video-openchrome firmware-realtek
Reboot the machine, If the wireless adaptor isn’t visable, unplugging and replugging the WIFI adaptor is all that should get it working.
To enable auto login, edit the lightdm config file
sudo nano /usr/share/lightdm/lightdm.conf.d/01_debian.conf
Look up these lines and uncomment them or add them and a complete the autologin-user line with the username of the user on your installation.
[Seat:*]
autologin-user=
autologin-user-timeout=0
Ready for Home Assistant..??
As of 28/05/2020 Home Assistant is a little up in the air – a good time to get on board right..?
I prefer the Supervised mode which involves running Home Assistant in a Docker environment on top of Debian. At the moment the installation process is a little broken, but this is how I get it to work.
The following is taken from https://community.home-assistant.io/t/installing-home-assistant-supervised-on-ubuntu-18-04-04/200020 where the supervised installation method has been forked
sudo -i

apt-get install -y software-properties-common apparmor-utils apt-transport-https avahi-daemon ca-certificates curl dbus jq network-manager socat

systemctl disable ModemManager

systemctl stop ModemManager

curl -fsSL get.docker.com | sh

curl -sL "https://raw.githubusercontent.com/Kanga-Who/home-assistant/master/supervised-installer.sh" | bash -s
Once the script has complete with following, the hard work is done.
Home Assistant is now installing itself.
[Info] Run Hass.io
[Info] Install cli 'ha'
Open a web browser either on the machine, (or from another) enter the ip address or host name followed by the port number 8123, e.g http://192.168.1.111:8123.
You can watch the installation progress.
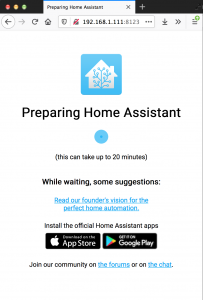
Once Completed, Home Assistant is ready to configure.

Have fun!