 While the blogging bug has managed to catch with me this time, I have decided to document some of my older projects.
So starting with requests, the first of my projects from the archives is an Amateur Radio repeater I made.
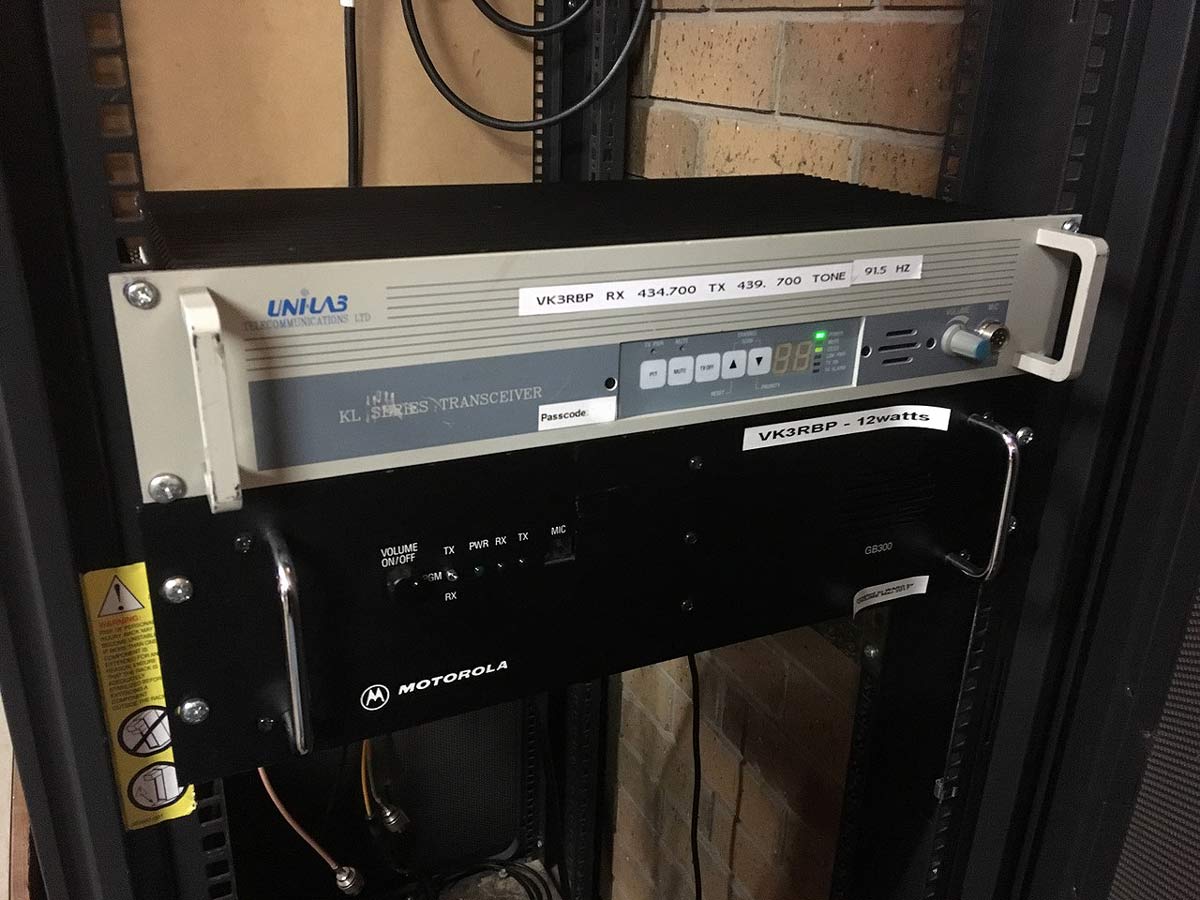
The Unilab repeater project started in early 2015 when Bill Husin – VK3YHT donated an ex Ambulance Victoria radio to Wimmera Amateur Radio Group for the purpose of building a new repeater with. I took it upon myself to familiarise myself with the radio and convert it to use on Amateur Radio.
After programming two new EPROMs for it, I quickly managed to tune it down onto the UHF amateur band. No modification of the receive PCB was required, only a good re-tune of the filter block.The transmit PLL quickly re-tuned to 440MHz, but the output was very inefficient – struggling to produce 15Watts at 20 Amps.
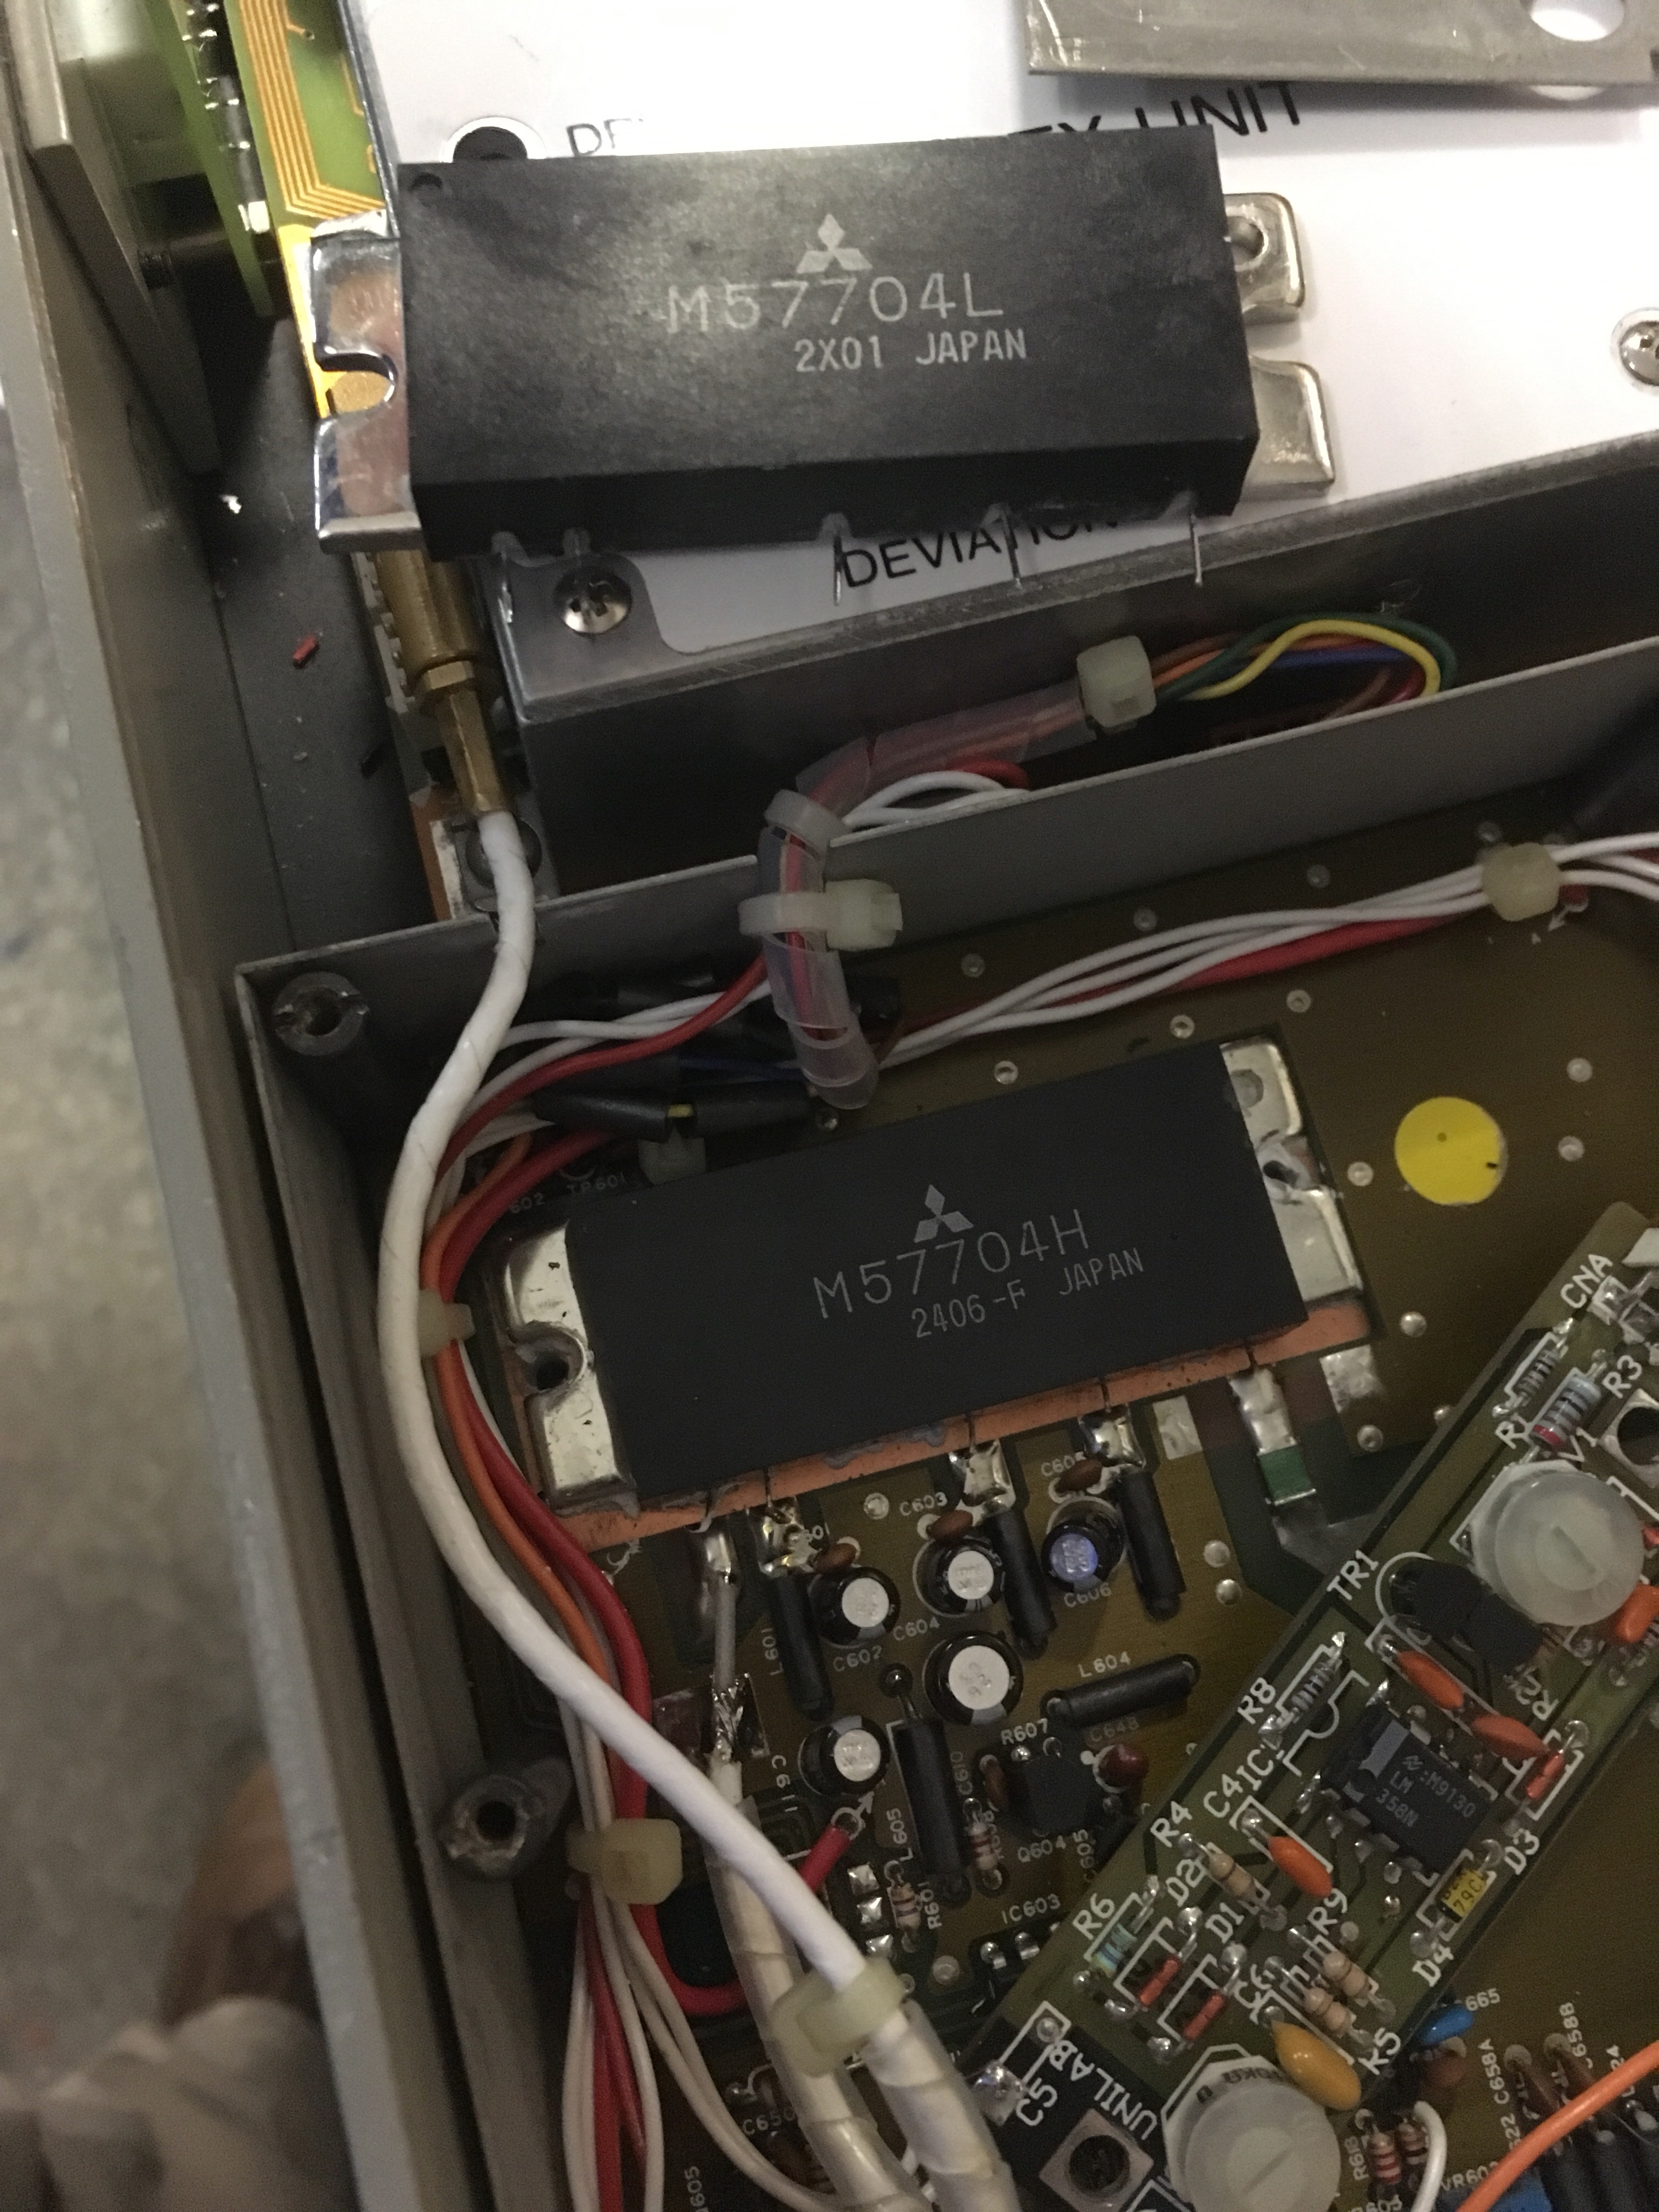
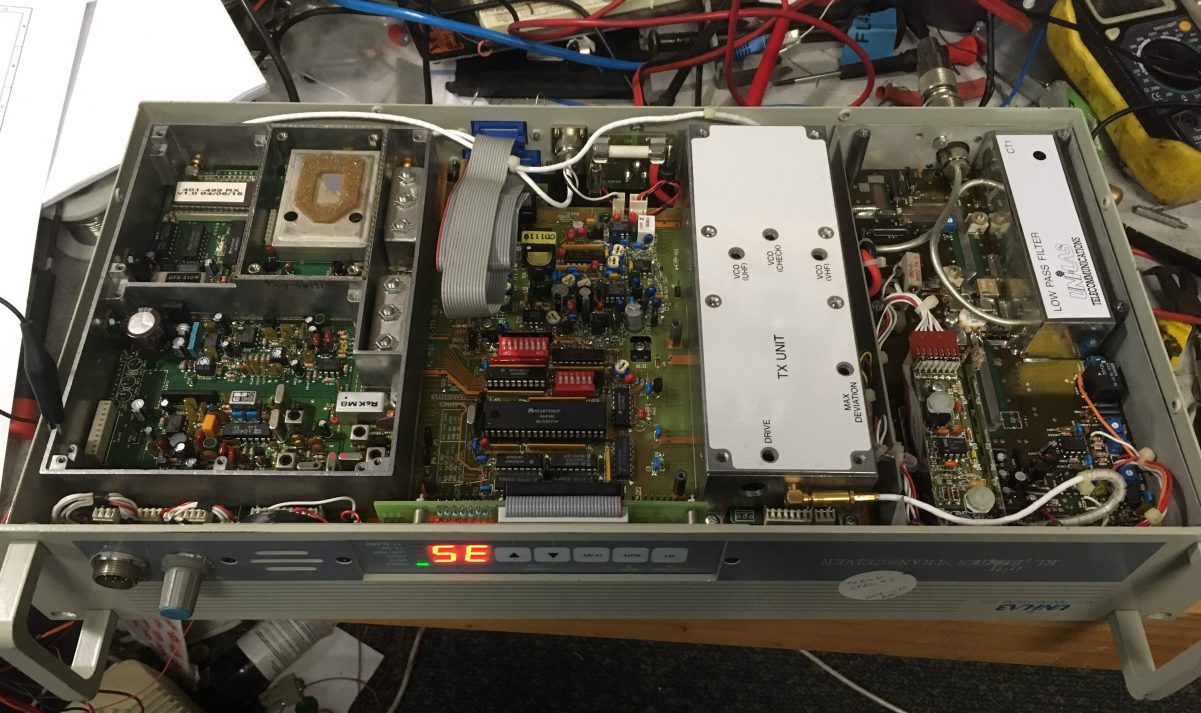
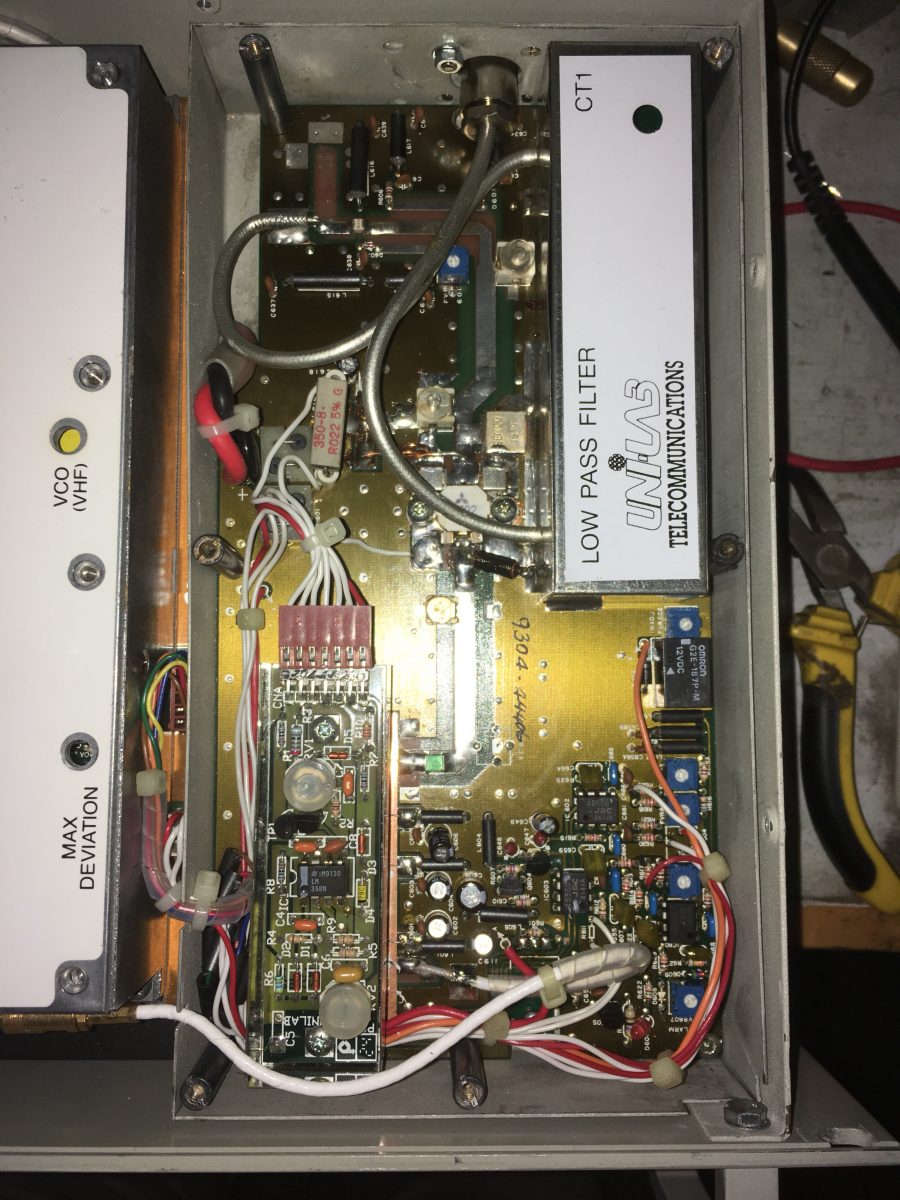
The Unilab employs a Mitsubishi M57704 PA module as the final amplifier of the TX board.
I managed to find a nice pair of of M57704M (one as a spare) on www.aliexpress.com. The modules are easy to replace and after about 15 minutes of work, I had had replaced the module with one suitable for Amateur 70cm band. The transceiver now transmits at 60W for about the same amount of current.

Initially I hoped to build a repeater controller separate to the KL450. I was hoping I might be able to find a rackmount case that looked similar to the transceiver. After a bit of research I discovered that Unilab had made a LIM-5 Line Interface Module. They were used to interface the Unilab radios to phone line and other radios for linking and voting.
I settled on a well priced LIM-5 on eBay and was rather impressed with what I found. Without much effort I was able to resurrect the device and interface it to the KL450 and loop it back on itself.
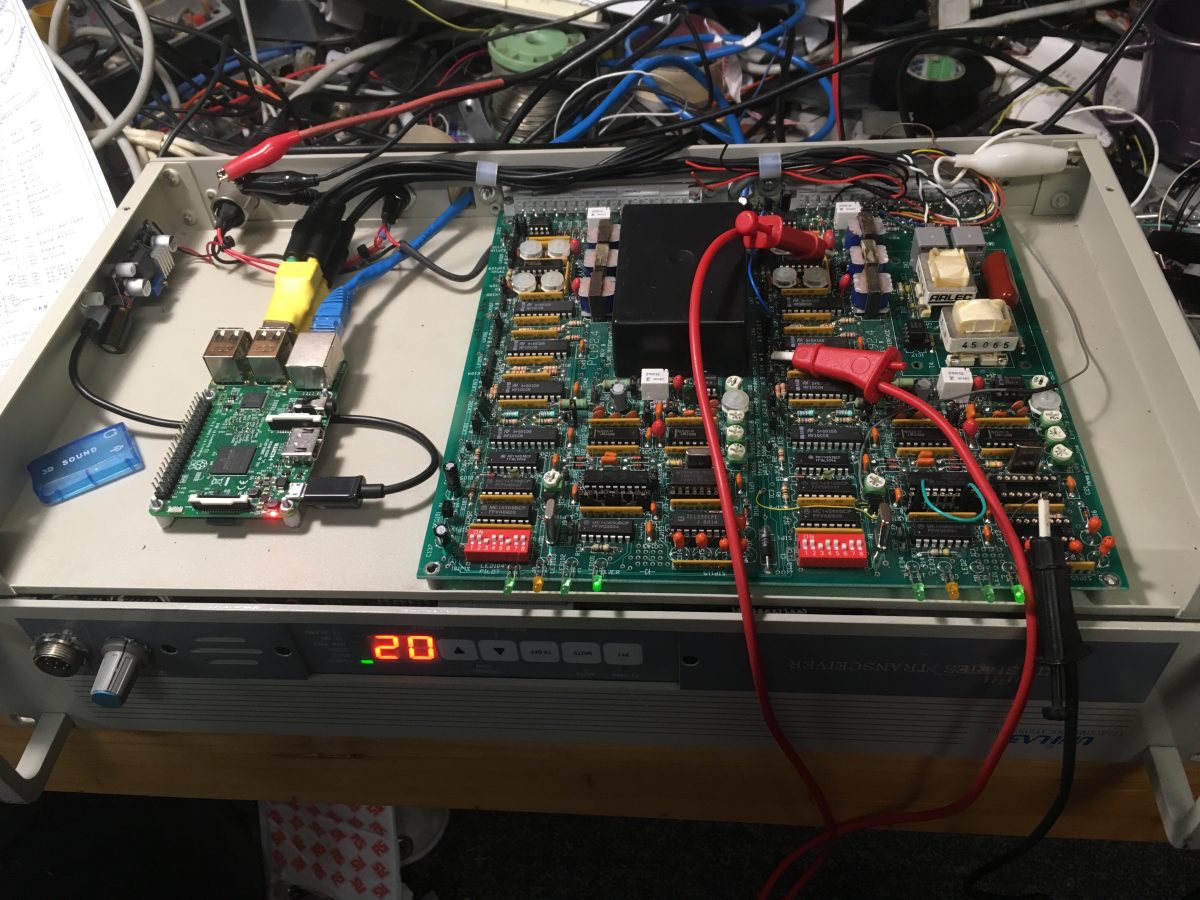
At the time, I was to use a Raspberry Pi to power the radio. There was a few projects around that did this but the one I favoured was Open Repeater. It has all the standard features that you would expect from a repeater controller like timers, idents and DTMF control, plus extras like echolink and voice idents, web interface and CTCSS encode.
There was plenty of room in the case of LIM-5 so the Raspberry PI fitted in quite nicely next to the LIM-5 PCB.
The LIM-5 uses a very clever circuit using which uses several MF10 filter block ICs for detecting and generating Voting Sub tones. It also uses the MF10 for filtering out the tones from the received voice. With a little bit of modification, the LIM-5 could be employed to handle CTCSS tones.
Traditionally voting tones can be anywhere between 2175Hz to 444Hz, while CTCSS tones are 67.0Hz to 253.3Hz. Never mind – the LIM-5 can detect most of the CTCSS tones by changing the main oscillator crystal.
I found that if the crystal is changed to a 2MHz crystal, then 30 of the CTCSS tones are achievable within 0.5Hz.
| CTCSS | Hz | LIM-5 | Div | CTCSS | Hz | LIM-5 | Div | |
| 5 | 79.7 | 79.68 | 251 | 19 | 127.3 | 127.39 | 157 | |
| 6 | 82.5 | 82.64 | 242 | 20 | 131.8 | 131.58 | 152 | |
| 7 | 85.4 | 85.47 | 234 | 21 | 136.5 | 136.99 | 146 | |
| 8 | 88.5 | 88.50 | 226 | 22 | 141.3 | 141.84 | 141 | |
| 9 | 91.5 | 91.32 | 219 | 24 | 151.4 | 151.52 | 132 | |
| 10 | 94.8 | 94.79 | 211 | 25 | 157.7 | 157.48 | 127 | |
| 11 | 97.4 | 97.56 | 205 | 26 | 162.2 | 162.60 | 123 | |
| 12 | 100.0 | 100 | 200 | 27 | 167.9 | 168.07 | 119 | |
| 13 | 103.5 | 103.63 | 193 | 28 | 173.8 | 173.91 | 115 | |
| 14 | 107.2 | 107.53 | 186 | 29 | 179.9 | 180.18 | 111 | |
| 15 | 110.9 | 111.11 | 180 | 31 | 192.8 | 192.31 | 104 | |
| 16 | 114.8 | 114.94 | 174 | 33 | 210.7 | 210.53 | 95 | |
| 17 | 118.8 | 119.05 | 168 | 38 | 250.3 | 250.00 | 80 | |
| 18 | 123.0 | 123.46 | 162 |
The desired CTCSS tone for VK3RBP is 91.5Hz, so a 2MHz crystal with a divide of 219, was close enough and the LIM-5 can now handle CTCSS for the repeater.
Very little further modification of the LIM-5 PCB need modification, most of it can be interfaced to the Raspberry Pi, by just setting the jumpers in the appropriate position and wiring the Raspberry Pi to the appropriate spot.
I have notes detailing the procedure for wiring it to the Raspberry Pi, but they seem to be misplaced in the move. I will publish them when I find them.
Another feature the LIM-5 has is two onboard V23 data modems using a TCM3105 IC. It is hoped in time, that I will be able to configure the LIM-5 to interface directly to the Raspberry Pi via shell, allowing remote configuration via packet radio.
Service manuals and programming software for the Unilab repeaters are available here with thanks to the Geelong Amateur Radio Club.
I have UNILAB KL450 Repeater
I adjust Driver unit FVR 301 max and Power unit VC601, 602, 603 and 604 for max power output but power out put 8W max. Before 45W come out .
Q 303 of Driver unit working fine which control by IC 308, FVR 301.
Waiting for solution .
Kind Regards !
4S5SC
Udaya
Hello Jamie, we have just been gifted a Uniden KL-450 to replace our 70cm repeater which will be at a solar powered site. Pickup can only be after the stay at home orders have finished. Do you know what we can expect the standby current to be?
Hi Brad,
I don’t have immediate access to the repeater any more so I can not check first hand.
But according to the manual power consumption is the following:
12A Transmit (50W)
700mA Receive
600mA Receive with CMOS EPROMS
460mA Receive with display disabled
30mA Powered down.
At the bottom of my post there is a link to where the service manuals are. I recommend familiarising yourself with the service manual – it is well written.
Thank you for getting back to me Jamie.